
1.xinput命令
1.1 查看xinput控制的触摸板设备id
└─$ xinput
⎡ Virtual core pointer                    	id=2	[master pointer  (3)]
⎜   ↳ Virtual core XTEST pointer              	id=4	[slave  pointer  (2)]
⎜   ↳ ROCCAT ROCCAT Kone Pure Owl-Eye Mouse   	id=11	[slave  pointer  (2)]
⎜   ↳ ROCCAT ROCCAT Kone Pure Owl-Eye Consumer Control	id=12	[slave  pointer  (2)]
⎜   ↳ BT5.0 KB                                	id=19	[slave  pointer  (2)]
⎜   ↳ SynPS/2 Synaptics TouchPad              	id=17	[slave  pointer  (2)]
⎣ Virtual core keyboard                   	id=3	[master keyboard (2)]
    ↳ Virtual core XTEST keyboard             	id=5	[slave  keyboard (3)]
    ↳ Power Button                            	id=6	[slave  keyboard (3)]
    ↳ Video Bus                               	id=7	[slave  keyboard (3)]
    ↳ Video Bus                               	id=8	[slave  keyboard (3)]
    ↳ Power Button                            	id=9	[slave  keyboard (3)]
    ↳ Sleep Button                            	id=10	[slave  keyboard (3)]
    ↳ ROCCAT ROCCAT Kone Pure Owl-Eye System Control	id=13	[slave  keyboard (3)]
    ↳ ROCCAT ROCCAT Kone Pure Owl-Eye         	id=14	[slave  keyboard (3)]
    ↳ Intel HID events                        	id=15	[slave  keyboard (3)]
    ↳ AT Translated Set 2 keyboard            	id=16	[slave  keyboard (3)]
    ↳ ROCCAT ROCCAT Kone Pure Owl-Eye Consumer Control	id=18	[slave  keyboard (3)]
    ↳ BT5.0 KB                                	id=20	[slave  keyboard (3)]
反馈中可以看到ynPS/2 Synaptics TouchPad 这一块很明显是触摸板了 记住它的id = 17
1.2使用xinput控制设备
└─$ xinput -help
usage:
	xinput get-feedbacks <device name>
	xinput set-ptr-feedback <device name> <threshold> <num> <denom>
	xinput set-integer-feedback <device name> <feedback id> <value>
	xinput get-button-map <device name>
	xinput set-button-map <device name> <map button 1> [<map button 2> [...]]
	xinput set-pointer <device name> [<x index> <y index>]
	xinput set-mode <device name> ABSOLUTE|RELATIVE
	xinput list [--short || --long || --name-only || --id-only] [<device name>...]
	xinput query-state <device name>
	xinput test [-proximity] <device name>
	xinput create-master <id> [<sendCore (dflt:1)>] [<enable (dflt:1)>]
	xinput remove-master <id> [Floating|AttachToMaster (dflt:Floating)] [<returnPointer>] [<returnKeyboard>]
	xinput reattach <id> <master>
	xinput float <id>
	xinput set-cp <window> <device>
	xinput test-xi2 [--root] <device>
	xinput map-to-output <device> <output name>|all
	xinput list-props <device> [<device> ...]
	xinput set-int-prop <device> <property> <format (8, 16, 32)> <val> [<val> ...]
	xinput set-float-prop <device> <property> <val> [<val> ...]
	xinput set-atom-prop <device> <property> <val> [<val> ...]
	xinput watch-props <device>
	xinput delete-prop <device> <property>
	xinput set-prop <device> [--type=atom|float|int] [--format=8|16|32] <property> <val> [<val> ...]
	xinput disable <device>
	xinput enable <device>
由xinput -help可知使用xinput disable id和xinput enable id可以切换设备的状态
2 使用shell脚本来实现设备的切换
2.1 建立脚本文件以及目录
┌──(keason㉿KeasonKali)-[/]
└─$ cd ~

┌──(keason㉿KeasonKali)-[~]
└─$ mkdir ownfunction

┌──(keason㉿KeasonKali)-[~]
└─$ cd ownfunction

┌──(keason㉿KeasonKali)-[~/ownfunction]
└─$ touch touchpad.sh
2.2 编写脚本
#!/bin/bash
device_id="刚刚获取的设备id"
#获取设备状态
device_status=$(xinput list-props "$device_id" | grep "Device Enable" | awk '{print $NF}')
#关闭设备函数
disable_device(){
	xinput disable "$device_id"
}
#启用设备函数
enable_device(){
	xinput enable "$device_id"
}
#切换设备状态函数
toggle_device(){
	if [ "$device_status" -eq 0 ];then
		enable_device
	else
		disable_device
	fi
}
#执行一次
toggle_device
3.添加系统快捷键
3.1 获取脚本的全部路径
在文件所在目录右键文件点属性
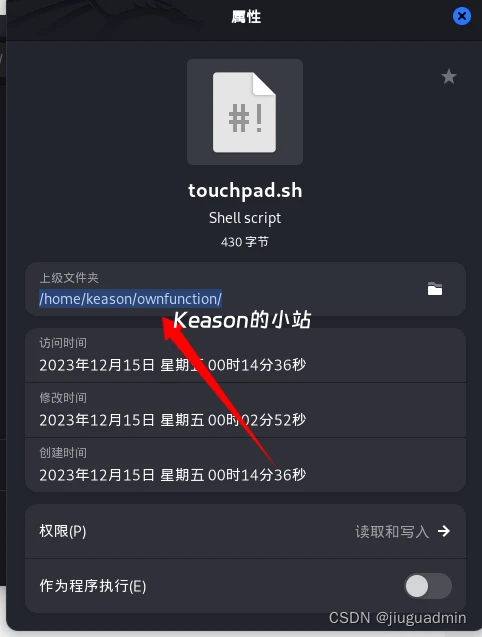
复制该路径
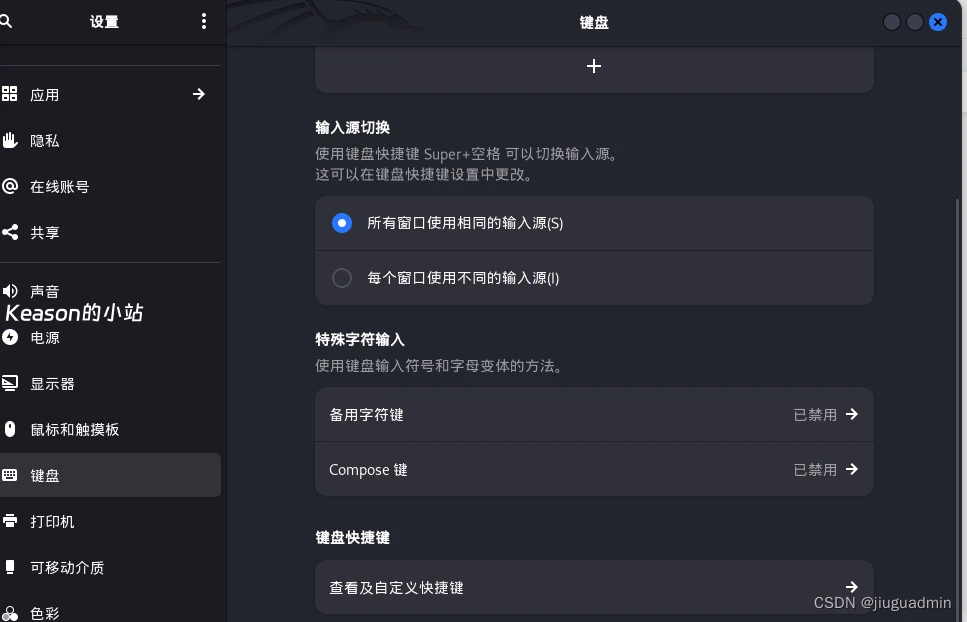
3.2 在系统中添加快捷键
设置>键盘>键盘快捷键
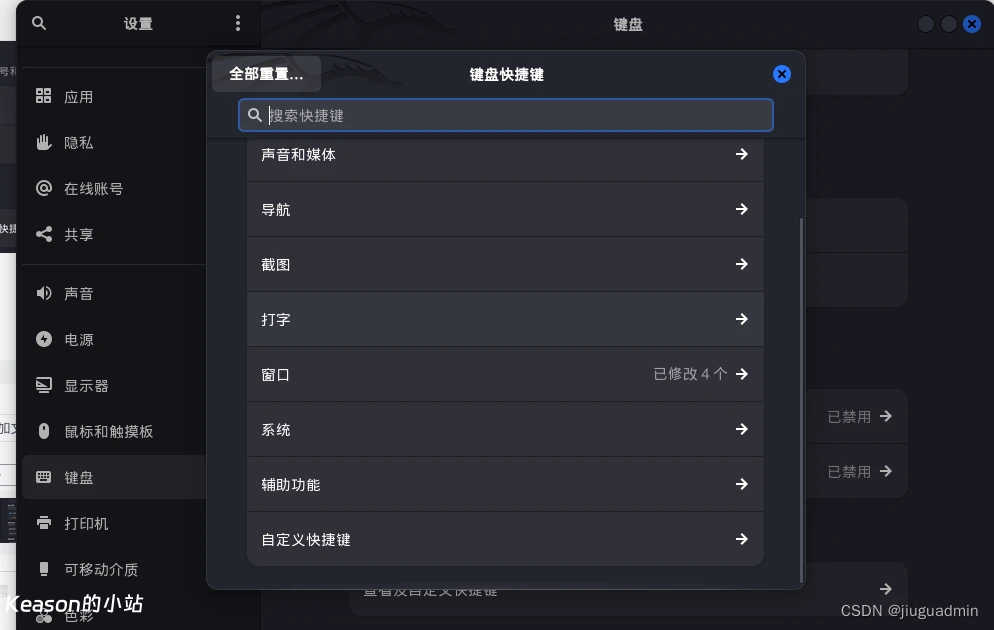
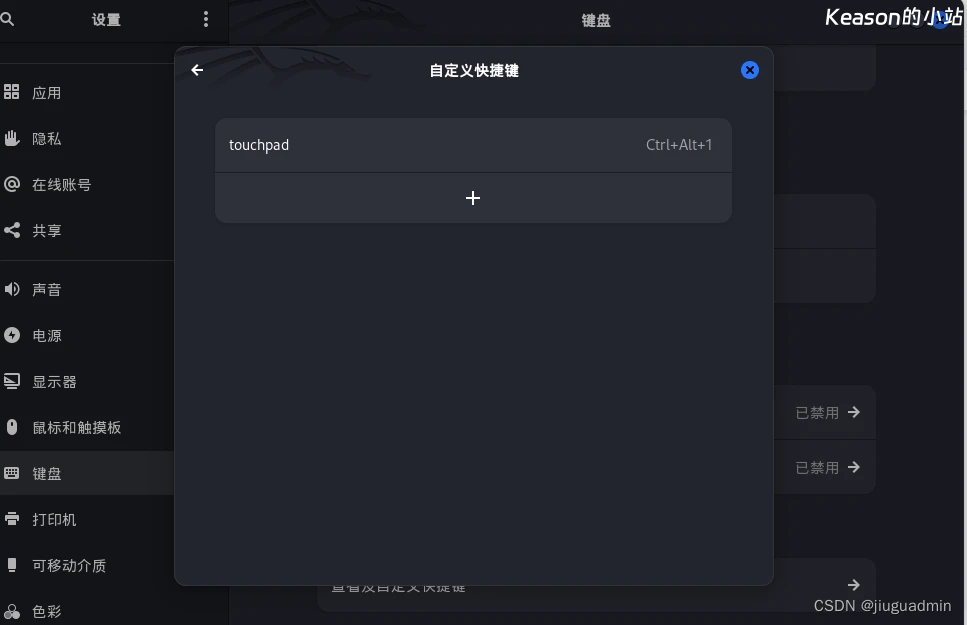
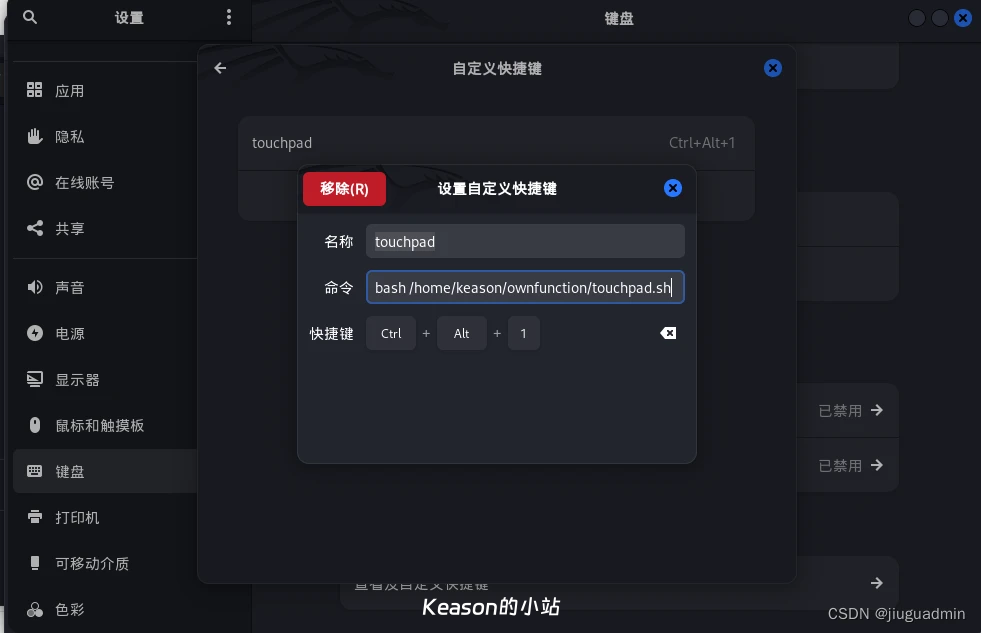
名称随意,命令为bash /你的脚本 快捷键自定义 那么功能就成功实现了
